How to Digitise Your Photos for Professional Restoration
When digitising your photos for restoration, the quality of the digital file makes a huge difference to the final result. For the best outcome, I need a high‑resolution image, ideally scanned at 600 dpi or higher. You can achieve this in two simple ways. The first option is to use a high‑resolution flatbed scanner. If you own one — or have access to one — just set it to 600 dpi or above, scan your photo, save it to your computer, and upload it to me by clicking HERE.
Digitising Your Photos Without a High‑Resolution Scanner
Of course, you may not have access to a high‑resolution scanner (most home printer/scanner units can’t reach 600 dpi), but don’t worry, you can still digitise your photos easily by re‑photographing them with your smartphone, and you won’t need any special apps to do it.
Digitising your photos using your smartphone
1. Photographic Prints
Attach your photo to a flat, vertical surface in a bright area — ideally outdoors, but not in direct sunlight. Make sure the photo is not behind glass, as this will cause reflection.
Next, follow these simple steps:
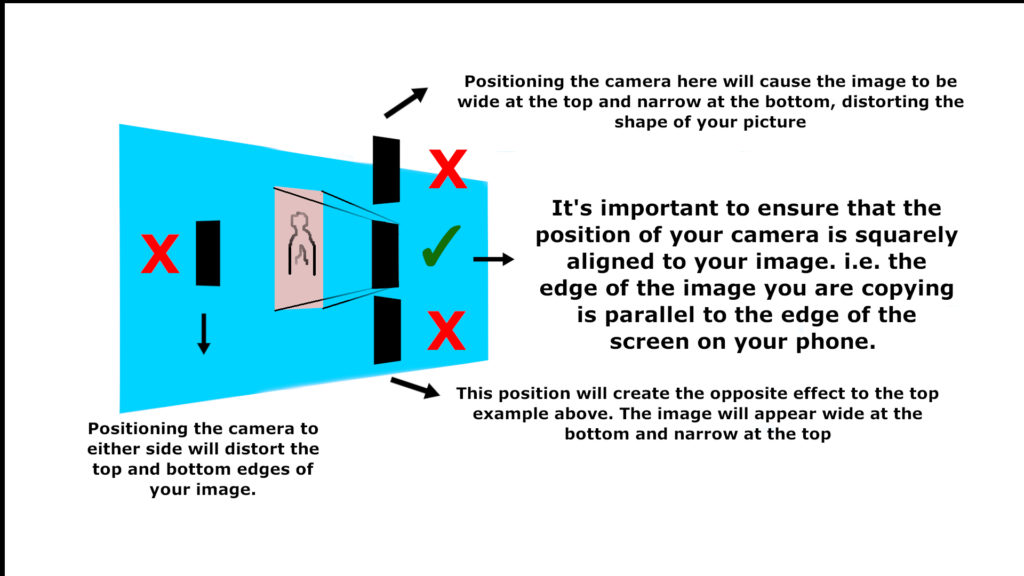
• Place your photo on a flat vertical surface (wall, door, or board). • Choose a bright location, ideally outside in open shade — never in full sun. • Remove any glass or frame to avoid reflections. • Position your smartphone directly in front of the photo, using a stand or tripod if you have one. • Keep the phone’s camera on the same plane as the photo to avoid distortion (as shown below). • Hold steady and take the photo, ensuring the whole image is in frame.
If you photographed the image hand‑held, take a few shots and choose the one where the edges are best aligned.
Leave a small border around the outside of the photo. I’ll crop this during the editing process.
Save your image as a JPEG, PNG, HEIC or GIF file (most smartphones save photos as JPEG or HEIC automatically).
When you’re ready, CLICK HERE to attach your image and send it through for restoration.
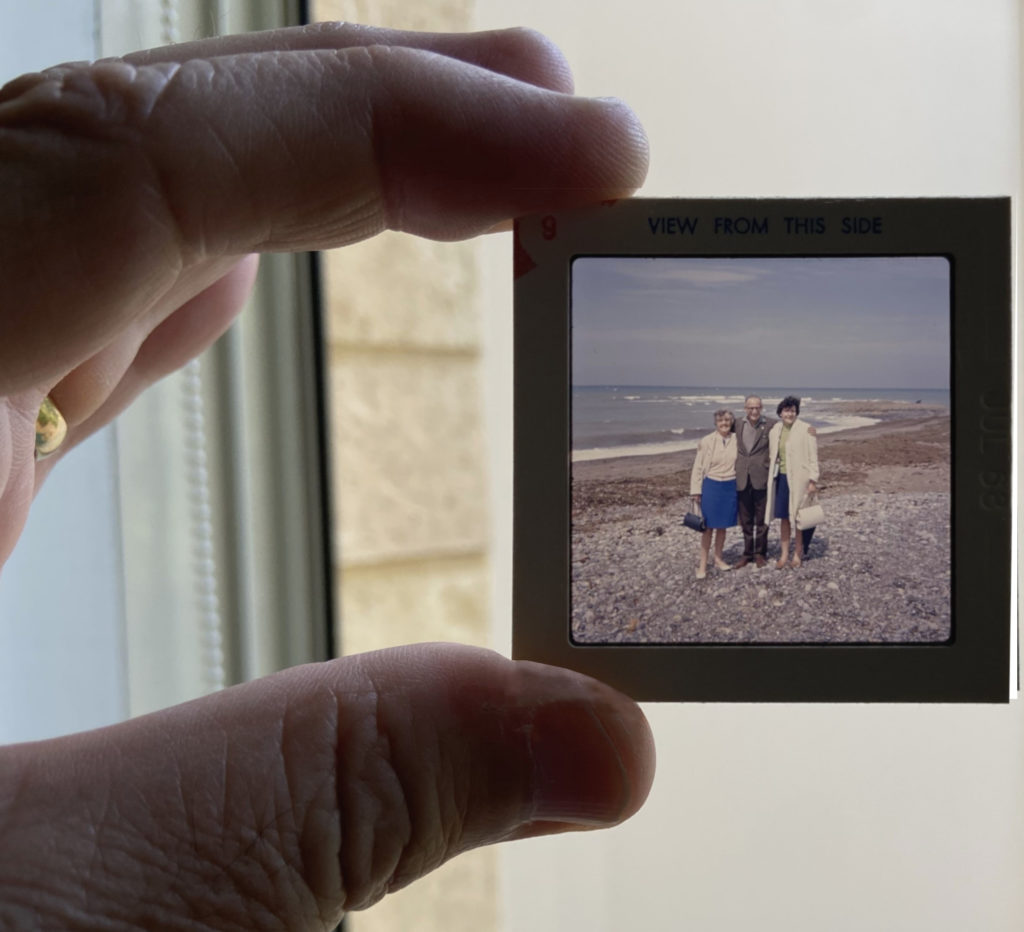
2. Digitise Photographic Slides and Negatives
Copying a slide or negative is a similar process, Just follow the same steps as above, with a few important differences:
Choosing the right background
• Create a bright background by shining a strong light onto a plain white screen or a light‑coloured wall. A brightly lit or sunlit wall or door works well. • Do not use patterned surfaces — any pattern will show through the slide or negative. • Avoid strongly coloured surfaces, as the colour will cast onto your image and distort the final result. • Do not use a computer screen as a back‑light. This will usually leave a visible grid or pixel pattern on your image.
What to do next
• Next, hold the slide or negative in front of the illuminated wall, or ask someone to hold it for you. • If you’re using an artificial light source, make sure the light does not shine directly onto the front of the slide or negative, as this will cause glare.
Position your smartphone in front of the image, ideally using a stand or tripod if you have one, although hand‑held is perfectly fine.
Make sure the phone’s camera is aligned on the same plane as the photo, just as shown in the illustration above.
If you photographed the image hand‑held, take a few shots and choose the one where the edges are best aligned. Leave a small border around the outside of the photo; I’ll crop this during the editing process.
Finally, save your image as a JPEG, HEIC, PNG, or PDF file.
Digitising your photos, slides, or negatives doesn’t need to be complicated, and you don’t need any special equipment to get started. Whether you scan them with a high‑resolution scanner or re‑photograph them with your smartphone, I’ll take care of the rest. Once your image is uploaded, I’ll restore it with the same care and attention I give to every project, ensuring your memories are preserved beautifully and ready to print, share, or frame.